Master how to frame a painting yourself: A DIY Guide
how to frame a painting yourself

Master how to frame a painting yourself: A DIY Guide

Transform your artwork with professional-looking frames, tailored to your style and budget, right from your home studio.

Start Framing Today

Key Takeaways

  • ✓ DIY framing can save 50-70% compared to professional services.
  • ✓ Proper framing protects artwork from environmental damage.
  • ✓ Choosing the right frame enhances the aesthetic appeal of a painting.
  • ✓ Basic tools and materials are readily available for home framing.

How It Works

1
Assess Your Artwork & Choose Your Frame Style

Understand the dimensions and medium of your painting. Select a frame style and material that complements the art piece and your decor.

2
Gather Materials & Prepare Your Workspace

Acquire all necessary tools like measuring tape, miter saw, clamps, and framing supplies. Set up a clean, well-lit area for precise work.

3
Cut & Assemble the Frame

Measure and cut your chosen molding accurately to create the four sides of the frame. Use wood glue and clamps to assemble the frame securely.

4
Mount the Painting & Finish the Frame

Carefully mount your painting within the assembled frame, ensuring it's centered and secured. Add backing, hanging hardware, and any protective finishes.

Understanding Your Artwork: The First Step to Perfect Framing
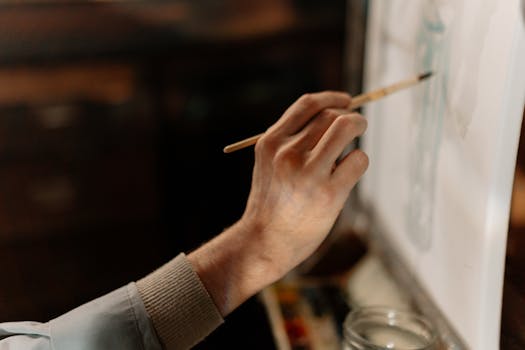
Close-up of an artist's hand painting on a canvas with a brush, capturing creativity. Photo: cottonbro studio / Pexels
Before you even consider wood types or mat colors, the journey of how to frame a painting yourself begins with a thorough understanding of the artwork itself. This foundational step is often overlooked but is absolutely critical for both the preservation and aesthetic presentation of your piece. Start by carefully examining the medium. Is it an oil painting on canvas, an acrylic on board, a watercolor on paper, or perhaps a pastel drawing? Each medium has unique properties and requires specific considerations for framing. Oil paintings on stretched canvas, for instance, typically don't require glass, but they do need a frame that can accommodate the stretcher bars. Watercolors and pastels, on the other hand, are highly susceptible to dust and smudging, making protective glass and a mat an essential component of their framing strategy. Understanding art mediums can greatly inform your framing choices. Next, consider the dimensions of your artwork. Accurate measurement is paramount. Use a metal tape measure for precision, measuring both the width and height of the painting itself, and if it's a canvas, the depth of the stretcher bars. These measurements will dictate the size of your frame and whether a mat board is feasible or necessary. Don't just eyeball it; even a millimeter off can lead to gaps or a forced fit, potentially damaging your art. Think about the style and period of the painting. A classical landscape might call for an ornate, traditional frame, while a minimalist abstract piece could be best served by a sleek, simple contemporary design. The frame should act as an extension of the art, not a distraction from it. It should enhance the viewer's experience, drawing their eye inward to the masterpiece you've created or acquired. Finally, assess the condition of your artwork. Are there any existing tears, creases, or areas of flaking paint? While framing can offer some protection, it's not a substitute for conservation. If your artwork is delicate or valuable, you might consider professional restoration before attempting to frame it yourself. For most DIY framers, ensuring the art is clean and stable is sufficient. This initial assessment phase empowers you to make informed decisions about materials, style, and protective measures, setting the stage for a successful and rewarding DIY framing project. Neglecting this crucial preparatory step can lead to costly mistakes and a less-than-ideal final presentation.

Choosing the Right Materials: Frame Molding, Mats, and Glazing Options
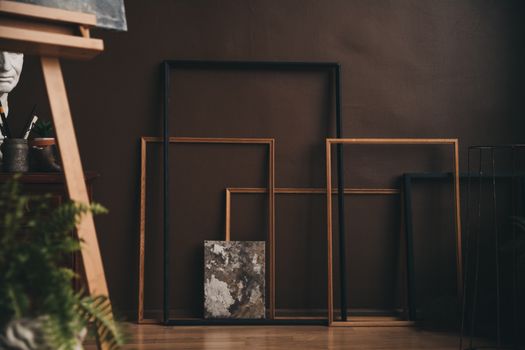
Aesthetic arrangement of wooden picture frames in a dimly-lit art studio with an easel. Photo: Lisett Kruusimäe / Pexels
Once you have a deep understanding of your artwork, the next critical phase in how to frame a painting yourself involves selecting the appropriate materials. This isn't just about aesthetics; it's about protection, longevity, and ensuring your frame complements rather than competes with your art. The frame molding itself is the most visible component. Wood is a popular choice, offering durability and a wide range of finishes, from natural oak to painted gesso. Metal frames, often aluminum, provide a sleek, modern look and are known for their strength and resistance to warping. When choosing molding, consider its profile – how it appears from the side. A deep rabbet (the groove where the artwork sits) is essential for canvases or multi-layered presentations with mats and glass. The width and ornamentation of the molding should be proportionate to your artwork; a small, delicate painting can be overwhelmed by a heavy, wide frame, while a large, bold piece might look insignificant in a thin, minimalist frame. Mat boards serve multiple functions: they create visual breathing room around the artwork, draw the eye towards the piece, and most importantly, prevent the artwork from touching the glazing. This is crucial for mediums like pastels and charcoals, where direct contact can cause smudging, and for any paper-based art where condensation could lead to mold. Mats come in various colors and textures, but for archival purposes, always opt for acid-free or conservation-grade mats. These materials prevent acidic degradation (acid burn) that can yellow and damage your artwork over time. The opening of the mat should be slightly smaller than your artwork to allow for secure mounting. Double or triple mats can add depth and sophistication, but ensure they don't overshadow the art. Glazing, or the protective layer over your artwork, comes in several forms. Standard clear glass offers good protection but can be reflective. Non-glare glass is treated to reduce reflections, but it can sometimes slightly diffuse the image. For the best clarity and UV protection, consider museum-quality glass or acrylic (Plexiglas). These options block a significant percentage of harmful UV rays, which can cause colors to fade, and offer superior clarity. Acrylic is lighter and more shatter-resistant than glass, making it a good choice for larger pieces or in areas where safety is a concern, though it can be more prone to scratching and static electricity. Always ensure your glazing is clean and free of dust before final assembly. The careful selection of these materials is pivotal to achieving a professional, long-lasting frame that truly elevates your painting.

Step-by-Step Assembly: Cutting, Joining, and Securing Your Frame

Close-up of a professional chop saw with measurement scale, ideal for woodworking tasks. Photo: Christina & Peter / Pexels
With your materials selected, it's time to dive into the hands-on process of how to frame a painting yourself. This stage requires precision, patience, and the right tools. Begin by preparing your workspace. A clean, flat, and stable surface is essential. You'll need a miter saw (manual or electric) for accurate angle cuts, a measuring tape, wood glue, clamps, a framing square, and a picture framing v-nailer or clamps for joining corners. Safety goggles and gloves are also recommended. The first critical step is accurate measurement and cutting. Measure the outside dimensions of your artwork (or mat opening if using a mat). Add twice the width of the frame's rabbet to this measurement to determine the inner edge length for each side of your frame. Each piece of molding will need a 45-degree miter cut at each end, angled inwards, so that when joined, they form perfect 90-degree corners. Precision here is key; even a slight error will result in gaps at the corners. Once your four pieces of molding are cut, dry-fit them together to ensure they form a perfect rectangle or square. If there are any gaps, recutting might be necessary. Apply a small, even bead of high-quality wood glue to both mitered surfaces of each joint. Press the corners together firmly, ensuring they align perfectly. This is where a framing clamp or strap clamp becomes invaluable, holding all four corners tightly while the glue sets. For added strength and stability, use a v-nailer to insert v-nails (also called underpinning wedges) into the mitered corners from the back. These small metal fasteners pull the joint even tighter and create a very strong bond. If you don't have a v-nailer, specialized corner clamps can hold the joint while the glue dries, and small finish nails (pre-drilled to prevent splitting) can be hammered in from the side, then filled and sanded. Learn more about woodworking for artists to enhance your framing skills. After the frame is assembled and the glue has fully cured (follow the manufacturer's recommendations, usually 24 hours), it's time to prepare for mounting your artwork. Clean the inside of the frame rabbet. If using glass, carefully clean both sides of the glass with a lint-free cloth and glass cleaner, ensuring no streaks or dust remain. Place the clean glass into the frame rabbet, followed by the mat (if using), then the artwork itself. For paper-based artwork, hinge it to the mat board using archival tape along the top edge, allowing the art to hang freely. For canvases, simply place it into the frame. Finally, add the backing board (acid-free foam core or cardboard) to protect the back of the artwork. Secure everything in place using framer's points, flexible tabs, or a point driver, pressing them into the inside edge of the rabbet. Finish by attaching hanging wire or D-rings to the back of the frame, ensuring it's centered and secure. A meticulously assembled frame not only looks professional but also provides the best protection for your cherished artwork.

Finishing Touches and Common Mistakes to Avoid
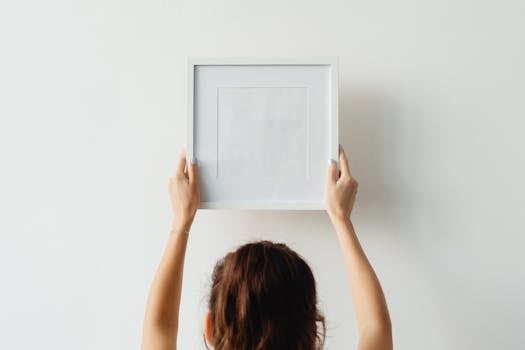
A woman hangs an empty frame on a white wall with copy space. Photo: https://kaboompics.com/ / Pexels
The final stage of how to frame a painting yourself involves adding those crucial finishing touches that elevate a DIY project to a professional standard, and understanding common pitfalls to avoid. Once your painting is securely nestled within its frame, examine the entire piece under good lighting. Check for any dust particles trapped between the glass and the artwork, smudges on the glass, or unevenness in the mat. It's much easier to correct these issues now than after the frame is fully sealed. You might consider adding a dust cover to the back of the frame. This is typically a piece of brown paper or acid-free craft paper glued or taped over the entire back of the frame, covering the backing board and sealing the contents from dust and insects. This simple step adds a layer of professionalism and protection. Attach your hanging hardware – D-rings or screw eyes should be placed approximately one-third of the way down from the top of the frame on each side. Thread a strong picture wire between them, ensuring there's a slight slack but not so much that the frame tips forward when hung. **Common Mistakes to Avoid:** * **Incorrect Measurements:** This is the most frequent and frustrating error. Always measure twice, cut once. Even a millimeter off can ruin a perfect miter joint. * **Non-Archival Materials:** Using acidic mats or backing boards will, over time, cause yellowing and degradation of your artwork. Invest in acid-free or conservation-grade materials. * **Touching the Artwork:** Oils from your skin can damage delicate surfaces. Always handle artwork, mats, and glass by the edges, preferably with clean cotton gloves. * **Over-tightening Hanging Wire:** A wire that is too tight puts undue stress on the frame's top rail, potentially causing it to warp or break. A slight slack is ideal. * **Ignoring the Medium:** Framing an oil painting behind glass can cause moisture buildup and damage. Always consider the specific needs of your artwork's medium. * **Inadequate Support:** For large or heavy pieces, ensure your hanging hardware and wall anchors are robust enough to support the weight. A falling frame is a damaged frame. * **Rushing the Process:** Framing requires patience. Rushing through cuts, glue drying times, or assembly can lead to mistakes and a less refined finish. Take your time, enjoy the process, and you’ll be rewarded with a beautifully framed piece that will last for years. By paying attention to these details and avoiding common errors, you can ensure your DIY framed painting not only looks stunning but is also preserved for generations to come. Your efforts in learning how to frame a painting yourself will be evident in the quality and longevity of your cherished art.

Comparison

FeatureDIY FramingOnline Custom FramingLocal Professional Framer
Cost SavingsSignificant (50-70%)Moderate (20-40%)Lowest (Full Price)
CustomizationUnlimited (DIY skill-dependent)Good (Pre-set options)Highest (Expert Consultation)
Time InvestmentHighLow (Order & Wait)Moderate (Consult & Wait)
Learning CurveHighNoneNone
Tool InvestmentRequiredNoneNone
Quality ControlDirect (By You)Varies by ProviderConsistently High
Archival Standards✓ (If chosen)✓ (Often Standard)✓ (Expert Guidance)
ConvenienceLowHighModerate

What Readers Say

"I always thought framing was too complex, but this guide on how to frame a painting yourself broke it down perfectly. My oil painting looks gallery-ready, and I saved a fortune!"

Sarah J. · Austin, TX

"Following these steps, I successfully framed three of my acrylic pieces. The detail on choosing materials and cutting angles made all the difference. Highly recommend for any artist."

Mark D. · Seattle, WA

"I used to pay hundreds for custom framing. After reading this, I framed a large watercolor myself, and it turned out beautifully, saving me over $300 on that one piece alone."

Emily R. · Miami, FL

"The guide is incredibly thorough, though the initial investment in tools can be a bit much. However, for anyone with multiple pieces to frame, it's definitely worth it in the long run."

David L. · Denver, CO

"As a hobbyist painter, learning how to frame a painting yourself has completely changed how I present my work. It's empowering to have full control over the final look and protection of my art."

Jessica M. · Chicago, IL

Frequently Asked Questions

What are the essential tools I need to frame a painting myself?

The essential tools include a miter saw (manual or electric) for precise 45-degree cuts, a metal measuring tape, wood glue, clamps (framing or strap clamps), a framing square, and a v-nailer or point driver for securing corners and contents. Safety goggles are also highly recommended.

Is DIY framing really cheaper than professional framing?

Yes, generally DIY framing can be significantly cheaper, often saving you 50-70% compared to professional services, especially after the initial investment in basic tools. The savings are particularly noticeable for multiple pieces or larger artworks.

How do I choose the right frame size for my painting?

Measure your artwork's exact dimensions (width and height). For a frame without a mat, the inside dimensions of your frame should match your artwork. If using a mat, the mat's opening should be slightly smaller than your art (e.g., 1/4 inch on each side) to create an overlap, and the frame's inside dimensions should match the outside dimensions of your mat board.

What type of glass or glazing should I use for my framed art?

The best choice depends on your artwork and budget. Standard clear glass is basic. Non-glare glass reduces reflections but can slightly diffuse the image. For optimal protection and clarity, consider museum-quality glass or acrylic (Plexiglas) which offers high UV protection and is lighter and shatter-resistant, though more prone to scratches.

Can I frame an oil painting behind glass?

It is generally not recommended to frame an oil painting behind glass, especially if the paint is still curing or if there's no air gap. Oil paintings need to breathe, and trapping them behind glass can cause moisture buildup, mildew, or adherence of the paint to the glass over time. Most oil paintings on canvas are framed without glass.

Who should consider learning how to frame a painting themselves?

Anyone with a passion for art, artists who create their own works, collectors looking to save money, or individuals who want custom framing options not readily available commercially. It's also ideal for those who enjoy hands-on projects and have a keen eye for detail.

What are the risks of improper framing?

Improper framing can lead to several risks, including damage to the artwork from acidic materials (yellowing, brittleness), moisture trapped behind glass, physical damage from an ill-fitting frame or inadequate hanging hardware, and overall degradation of the artwork's value and appearance. Correct archival techniques are crucial.

Are there any new trends in DIY art framing I should be aware of?

While classic framing techniques remain essential, trends lean towards sustainable materials, minimalist designs that let the art speak for itself, and innovative ways to incorporate LED lighting within frames. Floating frames for canvas art and shadow boxes for mixed media are also increasingly popular DIY projects.

Empower yourself to protect and display your cherished artwork with confidence. By mastering how to frame a painting yourself, you not only preserve your art but also infuse each piece with a personal touch that only a DIY approach can offer. Start your framing journey today and transform your home into your very own art gallery.

Topics: how to frame a painting yourselfDIY picture framingframing art at homecanvas framing techniquescustom art framing
Leo List

DK Escorts LU Escorts AT Escorts SE Escorts FI Escorts CH Escorts DE Escorts HR Escorts IE Escorts GR Escorts CZ Escorts NO Escorts BE Escorts FR Escorts SI Escorts IL Escorts NL Escorts PL Escorts HU Escorts ES Escorts IT Escorts PT Escorts SK Escorts RO Escorts ZA Escorts UY Escorts US Escorts UK Escorts NZ Escorts AU Escorts
Brampton weed
Adultwork EstrelaBet Vai de Bet R7 Bet Betão Galera Bet Rainbet Bet9ja Shop SportyBet BetKing Sisal Loto Foot Hollywoodbets YesPlay Odibets RushBet Jugabet BetWarrior BetCity MSport betPawa Fortebet