Mastering How to Frame a Canvas Painting Perfectly
June 19, 2026 16 min read 3,262 words
Elevate your artwork's presentation and longevity with our expert guide to framing canvas paintings.
Start Framing Now
Understanding Canvas Types and Frame Compatibility
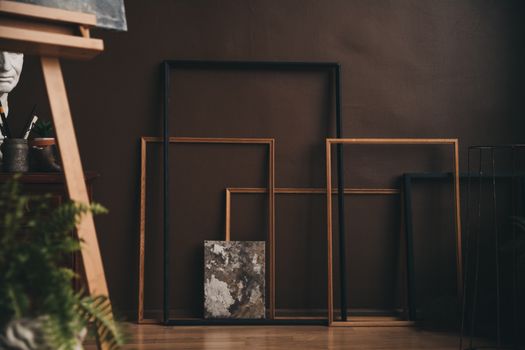 Photo: Lisett Kruusimäe / Pexels
Before you even consider purchasing a frame, understanding the type of canvas you have is paramount when learning how to frame a canvas painting. Not all canvases are created equal, and their construction significantly impacts the framing options available to you. Primarily, canvases fall into two main categories: standard wrap and gallery wrap. A standard wrap canvas typically has a thinner stretcher bar, often around 3/4 inch to 1 inch deep. The staples holding the canvas to the stretcher bars are usually visible on the sides. For these canvases, traditional frames are often the go-to choice. These frames have a rabbet (the recessed lip on the inside edge of the frame) deep enough to accommodate the canvas and any necessary backing materials. The challenge with standard wraps is that the frame needs to cover the stapled edges to provide a clean, finished look, which means you might lose a small portion of the painting along the edges to the frame's lip.
Gallery-wrapped canvases, on the other hand, are characterized by thicker stretcher bars, usually 1.5 inches deep or more. The canvas is stretched around the sides of these thicker bars and stapled on the back, leaving the sides clean and often painted as an extension of the artwork itself. This type of canvas is designed to be displayed unframed, offering a contemporary aesthetic. However, many artists and collectors still opt to frame gallery-wrapped canvases to enhance their presentation, protect them, and integrate them into specific decor styles. For gallery wraps, float frames (also known as floater frames) are an incredibly popular choice. These frames create a subtle gap between the canvas and the frame's inner edge, making the artwork appear to 'float' within the frame. This not only highlights the substantial depth of the canvas but also preserves the entirety of the artwork, including the painted sides, without covering any of the image.
Beyond these two main types, some canvases are mounted on panels or boards, which requires a different framing approach altogether, often more akin to framing works on paper with the addition of a mat and glazing (glass or acrylic). However, for the scope of this guide on how to frame a canvas painting, we'll focus primarily on stretched canvases. The choice between a traditional frame and a float frame is not just aesthetic; it's also practical. A traditional frame can offer a more classic, substantial presence, while a float frame provides a sleek, modern look. Consider the artwork's style, the room's decor, and your personal preference. A bold, abstract piece might thrive in a minimalist float frame, while a landscape painting could be beautifully complemented by a more ornate traditional frame. Remember, the goal is always to enhance the artwork, not overshadow it. Understanding these fundamental differences is your first step towards making an informed framing decision. For more insights on art presentation, explore our guide on
choosing art for your home.
Choosing the Right Frame Style and Material
Once you've identified your canvas type, the exciting part begins: selecting the frame style and material. This decision significantly impacts the overall aesthetic and mood of your framed artwork. The world of picture frames is vast, offering an array of profiles, finishes, and materials. For a traditional look, wooden frames remain a timeless choice. Hardwoods like oak, walnut, and maple offer durability and a classic appeal, often stained or painted to match various decors. More ornate traditional frames might feature intricate carvings or gilded finishes, perfect for classical portraits or landscapes. These frames tend to have a deeper rabbet to accommodate the canvas and often boast a wider profile, adding significant visual weight to the piece. When considering how to frame a canvas painting with a traditional frame, think about the period and style of the artwork. A vintage oil painting might look out of place in a stark, modern frame, just as a contemporary abstract piece might clash with an overly elaborate gold frame.
Float frames, as discussed, are the champions for gallery-wrapped canvases and modern artwork. They are typically made from wood or metal and designed with an L-shaped profile. The canvas is mounted from the back, creating that distinctive shadow gap between the canvas edge and the frame. This design allows the entire artwork to be visible, including the painted edges of a gallery wrap, making it a favorite for artists who extend their painting around the sides. Float frames come in various finishes, from natural wood to sleek black, white, or metallic options. The minimalist design of a float frame draws attention solely to the artwork, providing a clean, professional presentation.
Beyond traditional and float frames, consider the material. Wood is versatile and offers a warm, organic feel. Metal frames, often made from aluminum, provide a sleek, contemporary, and often industrial look. They are durable and can be very thin, offering a minimalist aesthetic that doesn't distract from the art. The finish of the frame is another critical element. Matte finishes can reduce glare and provide a sophisticated look, while glossy finishes can add a touch of drama and reflect light. Textured finishes can add tactile interest. Color plays a huge role too. A black frame can provide strong contrast and definition, making colors pop, while a white or light-colored frame can soften the look and blend seamlessly with lighter decor. Natural wood tones offer warmth and can complement earthy palettes.
Ultimately, the best frame enhances the artwork without competing with it. Take into account the colors within the painting, the dominant lines or shapes, and the overall emotional tone. A busy, colorful painting might benefit from a simple, understated frame, whereas a monochrome piece could handle a more decorative frame. Don't be afraid to experiment; sometimes, placing the artwork against different frame samples can provide the best insight. Remember that the frame is an extension of the artwork, guiding the viewer's eye and completing the piece's story. It's an investment in both protection and presentation.
Step-by-Step Guide: How to Frame a Canvas Painting
Now that you've selected your ideal frame, it's time to put theory into practice. This step-by-step guide will walk you through the process of how to frame a canvas painting, ensuring a professional and secure result.
**Step 1: Gather Your Tools and Materials.** You'll need your canvas painting, the chosen frame, a tape measure, a pencil, a screwdriver or drill (for attaching hardware), canvas offset clips or Z-clips (for traditional frames), and screws. For float frames, you might use specific float frame screws or L-brackets, depending on the frame design. A soft cloth and gloves are also recommended to protect your artwork from fingerprints and dust.
**Step 2: Measure Your Canvas Accurately.** This is perhaps the most critical step. Measure the exact width, height, and depth of your canvas. For float frames, you'll typically order a frame that is slightly larger than your canvas (e.g., 1/4 inch larger on each side) to create the signature 'floating' gap. For traditional frames, the inner dimensions of the frame (the rabbet opening) should match the outer dimensions of your canvas. Double-check all measurements to avoid costly mistakes.
**Step 3: Prepare the Frame and Canvas.** Lay your frame face down on a clean, soft surface to prevent scratching. If your frame came with any protective film or packaging, remove it carefully. Gently clean any dust or debris from both the frame and the canvas surface with a soft, dry cloth.
**Step 4: Position the Canvas in the Frame.**
* **For Traditional Frames:** Carefully place your canvas face down into the rabbet of the frame. Ensure it sits snugly and evenly within the frame opening. The frame's lip should slightly overlap the edges of your canvas, concealing the staples on standard wraps.
* **For Float Frames:** Place your canvas face down inside the float frame. Center the canvas so that the desired gap is even on all four sides. This might require some careful adjustment. Many float frames have a small ledge or lip inside where the canvas will rest.
**Step 5: Secure the Canvas.** This is where the specific hardware comes into play.
* **For Traditional Frames:** Use canvas offset clips or Z-clips. These clips have an offset bend, allowing them to bridge the gap between the canvas stretcher bar and the back of the frame. Position these clips evenly around the perimeter of the frame, typically 2-3 clips per side for smaller canvases, and more for larger ones. Screw one end of the clip into the frame and the other into the canvas stretcher bar. Ensure the screws are not too long and won't protrude through the front of your canvas.
* **For Float Frames:** Many float frames come with specialized float frame screws or L-brackets. These are designed to attach the back of the canvas stretcher bars directly to the inner wall of the float frame. Pre-drilling pilot holes into the stretcher bars can prevent wood splitting. Again, ensure screws are the correct length. Some float frames might use small blocks of wood that are screwed into the canvas and then into the frame. The key is to create a secure attachment without damaging the artwork or the frame.
**Step 6: Add Hanging Hardware.** Once your canvas is securely framed, attach appropriate hanging hardware to the back of the frame. D-rings with picture wire are a common and secure choice for most canvases. Position the D-rings about 1/3 of the way down from the top of the frame on each side. Screw them securely into the wooden frame material. Thread picture wire between the D-rings, leaving a slight slack (a gentle curve when held taut) to allow the frame to hang flat against the wall. Alternatively, saw-tooth hangers can be used for smaller, lighter frames, or heavy-duty strap hangers for very large pieces. Always choose hardware appropriate for the weight of your framed artwork.
**Step 7: Final Inspection.** Before hanging, give your framed painting a thorough inspection. Check that the canvas is centered, the frame is clean, and all hardware is securely attached. Step back and admire your beautifully framed artwork! This process, while seemingly detailed, ensures your painting is not only displayed magnificently but also protected for years to come. For more on art care, check out this guide on
preserving your artwork.
Common Mistakes to Avoid and Expert Tips for Perfect Framing
Framing a canvas painting can be a rewarding endeavor, but it's also ripe for common pitfalls that can detract from the artwork's presentation or even cause damage. Being aware of these mistakes and implementing expert tips will ensure your framing project is a success.
**Common Mistakes to Avoid:**
* **Incorrect Measurement:** This is by far the most frequent and impactful error. A frame that's too large will leave unsightly gaps, while one that's too small simply won't fit. Always measure multiple times and consider the tolerances. For float frames, forgetting the 'float' gap in your measurements can lead to a frame that's too tight.
* **Choosing the Wrong Frame Style:** Pairing a delicate watercolor with a heavy, ornate frame, or a vibrant abstract with a muted, traditional one can create a visual dissonance that detracts from both the art and the decor. The frame should complement, not compete.
* **Using Inappropriate Hardware:** Using screws that are too long can puncture the canvas from the back. Using flimsy hanging wire for a heavy frame is a recipe for disaster. Always match your hardware to the weight and type of your artwork and frame.
* **Over-tightening Screws:** This can strip the wood, leading to an insecure attachment or even cracking the frame material or stretcher bars. Screw until snug, but avoid excessive force.
* **Forgetting Protective Measures:** Handling the artwork with dirty hands or without gloves can leave oils and smudges. Not laying the frame on a soft surface during assembly can lead to scratches.
* **Ignoring the Depth of the Canvas:** A traditional frame with an insufficient rabbet depth won't accommodate a thick gallery-wrapped canvas, leaving it protruding unappealingly from the back.
**Expert Tips for Perfect Framing:**
* **Visualize Before You Buy:** If possible, take your artwork to a frame shop and try out different frame samples. Alternatively, use online visualization tools or even hold up samples you've cut from cardboard to get a sense of the scale and proportion.
* **Consider the Wall Color:** The color of the wall where the painting will hang can influence your frame choice. A stark contrast can make the painting pop, while a complementary color can create a harmonious blend.
* **Invest in Quality Materials:** While DIY framing can save money, don't skimp on the quality of the frame itself or the hardware. A well-made frame will protect your artwork better and last longer.
* **Use a Framing Square:** For DIY frame building, a framing square is invaluable for ensuring perfectly mitered corners and a true rectangular shape.
* **Practice on Scrap Wood:** If you're new to attaching hardware or cutting wood for a DIY frame, practice on scrap pieces first to get a feel for the tools and prevent mistakes on your actual frame or artwork.
* **Cleanliness is Key:** Work in a clean, dust-free environment. Use a soft, lint-free cloth to wipe down both the canvas and the frame before assembly.
* **Don't Rush:** Framing requires patience and precision. Take your time with each step, especially measurements and securing the canvas. Rushing leads to errors.
* **Consider Professional Help for Valuable Pieces:** For very valuable or delicate artwork, or if you're feeling unsure, consider consulting a professional framer. Their expertise can be invaluable in preserving and presenting your art.
By heeding these warnings and incorporating these tips, you'll approach the task of how to frame a canvas painting with confidence, resulting in a beautifully presented and well-protected piece of art that you can proudly display.
