Mastering How to Draw Realistic Portraits
how to draw realistic portraits

Mastering How to Draw Realistic Portraits

Transform your artistic vision into stunningly lifelike portraits with proven techniques and expert guidance.

Start Your Portrait Journey

Key Takeaways

  • ✓ Understanding facial anatomy is crucial for realistic portraits.
  • ✓ Light and shadow play a vital role in creating depth and form.
  • ✓ Practice observing subtle nuances in human features.
  • ✓ Patience and consistent practice are key to mastery.

How It Works

1
Understand Basic Anatomy

Before picking up your pencil, familiarize yourself with the underlying bone structure and muscle groups of the human face. This foundational knowledge will inform your proportions and placements, making your drawing inherently more believable.

2
Master Proportions and Placement

Learn the classical rules of facial proportion, such as the 'rule of thirds' for eyes and nose, but also understand when and how to deviate for individual likeness. Accurate placement of features is paramount for capturing a recognizable face.

3
Develop Shading and Form

Explore various shading techniques to create the illusion of three-dimensionality. Understanding how light interacts with surfaces will allow you to sculpt features and define the contours of the face, bringing your portrait to life.

4
Capture Likeness and Expression

Beyond technical accuracy, learn to observe and render the unique characteristics and subtle expressions that define an individual. This involves keen observation and a sensitive touch to convey personality.

The Foundations of Realistic Portrait Drawing: Anatomy and Proportion

Creative sketch designs and drawing tools neatly arranged on a wooden table in a flat lay setup. 
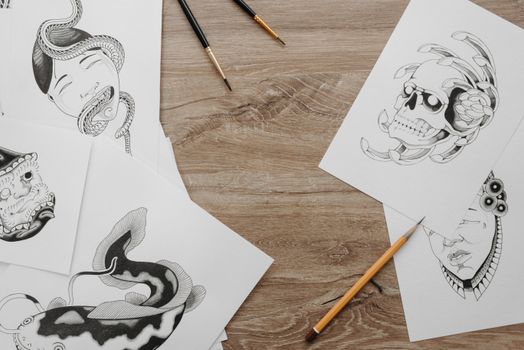
Photo: Pavel Danilyuk / Pexels
Embarking on the journey of how to draw realistic portraits begins with a deep understanding of the human face's underlying structure. Think of the skull as the blueprint, dictating the overall shape and placement of features. Without this foundational knowledge, even the most meticulous shading can result in a flat, unconvincing image. Start by studying basic skull anatomy: identify the cranium, jawline, eye sockets, nasal cavity, and cheekbones. Understanding these bony landmarks will guide your initial sketch, ensuring your proportions are accurate from the very beginning. Many aspiring artists jump straight into drawing eyes or mouths, but a solid head shape, built upon anatomical knowledge, provides the necessary framework. Explore different angles and how these landmarks shift in perspective. For instance, the jawline appears shorter and wider when viewed from below, and the eye sockets recede when seen in profile. Once you have a grasp of the skull, move on to the muscles that overlay it. While you don't need to memorize every single muscle, knowing the major groups—like the temporalis, masseter, orbicularis oculi, and orbicularis oris—will help you understand how facial expressions are formed and how soft tissue drapes over bone. These muscles create the subtle bumps and hollows that define a face. For example, the zygomaticus major muscle connects the cheekbone to the corner of the mouth, playing a key role in smiling. Understanding its action will allow you to draw more convincing smiles and frowns. Practice drawing these muscle groups over a basic skull structure to see how they interact and contribute to the overall form. This combination of bone and muscle knowledge is indispensable for creating a believable three-dimensional head. Next, we delve into the crucial aspect of proportion. While every face is unique, there are general guidelines that serve as an excellent starting point for how to draw realistic portraits. The 'rule of thirds' is a classic: the hairline to the brow, the brow to the base of the nose, and the base of the nose to the chin are often roughly equal in length. Similarly, the width of the head is typically five eye-widths across, with one eye-width separating the eyes. These are not rigid rules but flexible guidelines that help establish a harmonious balance. Use measuring techniques, such as holding your pencil up to your reference to compare lengths and angles, to translate proportions accurately onto your paper. Pay close attention to negative space – the shapes formed between features – as these can often reveal inaccuracies in your drawing more readily than the features themselves. Consistent practice with these foundational elements will build a strong scaffolding for all your future portrait work, allowing you to move beyond simple copying to truly understanding what you are drawing. For further exploration into broader artistic principles, check out our resources on fundamental drawing techniques.

Mastering Light and Shadow: Creating Depth in Portraits

Detailed image of a hand sketching a human face in a sketchbook, emphasizing creativity. 
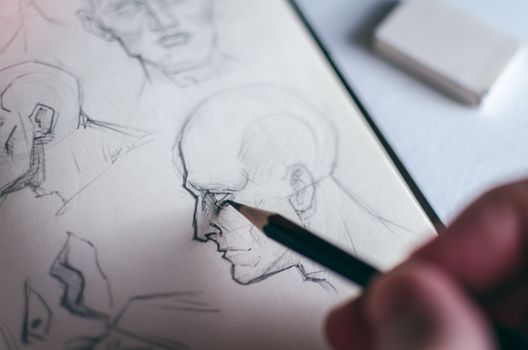
Photo: MESSALA CIULLA / Pexels
After establishing accurate anatomy and proportions, the next critical step in how to draw realistic portraits is to master the interplay of light and shadow. Light is what reveals form; without it, our drawings would remain flat and lifeless. Understanding how light sources interact with the three-dimensional surfaces of the face is paramount. Begin by identifying your light source: Is it coming from above, below, the side, or directly in front? The direction and intensity of the light will dictate where highlights, mid-tones, core shadows, reflected light, and cast shadows fall. For instance, a light source from above will typically illuminate the forehead, nose bridge, and cheekbones, while casting shadows under the brow, nose, and chin. Conversely, a light source from below can create dramatic, almost eerie effects, reversing these shadow patterns. Developing a strong value scale is essential. This refers to the range of tones from the brightest white to the darkest black. Practice creating smooth gradations between these values using various shading techniques like hatching, cross-hatching, stippling, and blending. Each technique offers a different texture and level of control. For realistic portraits, blending is often favored for smooth skin tones, while subtle hatching can be used for texture in hair or clothing. Pay close attention to the edges of your shadows. Hard edges typically occur where a form turns sharply away from the light, or where one object casts a shadow onto another. Soft edges, on the other hand, indicate a gradual curve or a shadow that is further away from the object casting it. These nuances in edge quality significantly contribute to the illusion of realism. Reflected light is a subtle yet crucial element often overlooked by beginners. This is light that bounces off surrounding surfaces (like clothing, a wall, or even the neck) and illuminates the shadow areas of the face. It prevents shadows from becoming completely black and adds a sense of atmosphere and realism. For example, a shadow under the chin might not be uniformly dark; the neck or collar could reflect light back into it, creating a slightly lighter, warmer tone within the shadow. Observe these subtleties in your reference material. Don't just draw what you think you see, but what is actually there. By meticulously rendering these light and shadow patterns, you are essentially sculpting the face on a two-dimensional surface, giving it volume and presence. This mastery of chiaroscuro is what truly elevates a good portrait to a realistic one, transforming lines and shapes into believable human form.

Capturing Likeness and Expression: The Soul of Realistic Portraits

An artist skillfully draws a portrait using charcoal in a bright art studio, showcasing creativity and focus. 
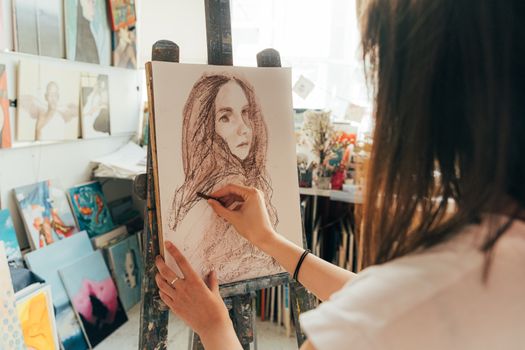
Photo: AI25.Studio Studio / Pexels
Once the structural and tonal elements are in place, the true artistry of how to draw realistic portraits emerges in capturing likeness and expression. This is where your portrait transcends being merely technically correct and becomes a recognizable individual. Likeness isn't just about getting proportions right; it's about observing and rendering the unique, subtle characteristics that make a person distinct. Pay meticulous attention to details: the slight asymmetry of a nose, the specific curve of an eyebrow, the exact shape of an eyelid crease, or the individual pattern of wrinkles around the eyes. These small deviations from the 'ideal' or average face are what define a person's individuality. Train your eye to see these nuances by spending ample time studying your reference, whether it's a live model or a photograph. Don't rush the observation phase; it's as important as the drawing itself. Beyond individual features, expression is the emotional core of a portrait. A neutral face is rarely truly neutral; there are always subtle muscle tensions or relaxations that convey an underlying mood or personality. When drawing an expression, consider how it affects the entire face. A smile, for instance, doesn't just involve the mouth; it crinkles the eyes, lifts the cheeks, and can even affect the forehead. Study how different emotions alter the facial muscles, causing wrinkles, dimples, or changes in the shape of the eyes and mouth. Practice drawing various expressions to build a repertoire of visual cues. It’s not just about drawing a frown line, but understanding *why* that frown line appears and how it integrates with the surrounding features. The eyes, in particular, are often considered the 'windows to the soul' and are crucial for conveying emotion and establishing connection with the viewer. The direction of the gaze, the size of the pupils, and the tension in the eyelids all contribute to the overall expression. Developing your observational skills is an ongoing process. Regularly practice quick sketch studies of faces, focusing solely on capturing the essence of an expression or a unique feature. Use a variety of references, from diverse age groups and ethnicities, to broaden your understanding of facial diversity. Remember that capturing likeness is often about capturing the *spirit* of the person, not just a photographic copy. Sometimes, a slight exaggeration of a characteristic can even enhance the likeness, making the portrait feel more 'them' than a perfectly accurate but sterile rendition. This sensitive balance between objective observation and artistic interpretation is what truly defines a master portrait artist. Don't be afraid to experiment and trust your artistic intuition as you hone these skills. For more inspiration on artistic expression, visit our section on expressive art forms.

Common Pitfalls and Advanced Tips for Realistic Portraits

A person sketching a wine bottle on paper with a pencil. Artistic process in a creative setting. 
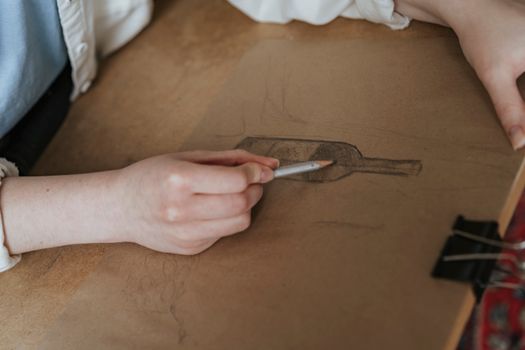
Photo: olia danilevich / Pexels
As you continue your journey in how to draw realistic portraits, you'll inevitably encounter common challenges. Being aware of these pitfalls can help you avoid them and accelerate your progress. One of the most frequent mistakes is symmetrical drawing. While faces appear symmetrical at first glance, true realism lies in the subtle asymmetries. No human face is perfectly symmetrical; one eye might be slightly higher, one side of the mouth a touch wider, or a cheekbone more pronounced. Embrace these imperfections as they contribute significantly to an individual's unique likeness. Another common issue is drawing features in isolation, rather than seeing them as interconnected parts of a whole. The eyes, nose, and mouth must relate to each other in terms of size, angle, and distance. Constantly check these relationships as you draw, rather than just focusing on rendering each feature perfectly by itself. Lack of sufficient contrast is another pitfall that can make realistic portraits appear flat. Don't be afraid to push your darks darker and your lights lighter, especially in areas where light transitions into shadow. A full range of values is crucial for creating depth and form. Conversely, over-blending can lead to a 'plastic' or airbrushed look, erasing the subtle textures of skin and hair. Use blending sparingly and strategically, ensuring that you retain some of your pencil marks to suggest texture and life. Finally, many artists struggle with hair. Instead of drawing individual strands, think of hair as masses of light and shadow, with highlights and darker areas defining its form and flow. Focus on the direction of growth and the overall shape, adding only a few individual strands for detail where necessary. **Advanced Tips for Elevating Your Portraits:** * **Work from Life:** While photographs are convenient, drawing from a live model forces you to interpret three-dimensional form and constantly adjust for subtle movements and changing light. This greatly enhances your observational skills. * **Understand Planes of the Face:** Think of the face as a series of simplified geometric planes. This helps you understand how light falls on different surfaces and how to block in shadows more effectively before refining them. * **Study Master Artists:** Analyze how historical and contemporary masters approach portraiture. What techniques do they use for eyes, hair, or skin? How do they convey emotion? * **Vary Your Edges:** As mentioned before, varying the sharpness and softness of your edges adds realism. Use sharp edges for areas in focus or where forms meet abruptly, and soft edges for areas that recede or have gradual transitions. * **Don't Forget the Background:** Even a simple background can enhance your portrait. Consider its value and how it contrasts with or complements the subject's face. A too-busy or too-light background can detract from the realism of the portrait itself. * **Practice, Practice, Practice:** There's no substitute for consistent effort. The more you draw, the more your hand will learn to translate what your eye sees, and the more intuitive the process of how to draw realistic portraits will become.

Comparison

FeatureGraphite PencilCharcoalColored Pencil
Detail CapabilityVery HighModerateHigh
Value RangeGood (to dark black)Excellent (deep blacks)Moderate
Blending EaseModerateExcellentChallenging
ErasabilityGoodFairDifficult
Texture ControlHighModerateHigh

What Readers Say

"This guide completely demystified the process of how to draw realistic portraits. The sections on anatomy and light were particularly enlightening, and I've already seen a huge improvement in my work."

Sarah J. · Austin, TX

"I've been struggling with realistic rendering for years. The advice on capturing likeness and avoiding common pitfalls here was invaluable. My portraits finally look like the people I'm drawing!"

Mark T. · Portland, OR

"Following these steps, I managed to draw a portrait of my grandmother that brought tears to her eyes. The depth and realism I achieved felt impossible before reading this article."

Elena R. · Miami, FL

"A very thorough and helpful guide. While some parts felt a bit advanced for a complete beginner, the core principles for how to draw realistic portraits are explained clearly and effectively."

David L. · Chicago, IL

"As a digital artist, I found the principles of light, shadow, and anatomy equally applicable to my medium. This article provided a strong theoretical foundation that translated perfectly to my digital workflow."

Jessica H. · Denver, CO

Frequently Asked Questions

What's the most crucial skill for how to draw realistic portraits?

The most crucial skill is keen observation. It's about training your eye to truly see the subtle nuances of form, light, shadow, and individual characteristics, rather than drawing what your brain 'thinks' a face should look like. This foundational ability informs every other technique you learn.

Is it possible to learn how to draw realistic portraits without natural talent?

Absolutely! While some individuals may have a predisposition, drawing realistic portraits is a skill developed through consistent practice, understanding fundamental principles, and patient observation. Talent is often just persistent effort disguised.

How do I start a realistic portrait drawing?

Begin with a light, accurate sketch of the head's overall shape and basic proportions, focusing on anatomical landmarks. Gradually refine these shapes, block in the major light and shadow areas, and then slowly build up detail and value, working from general to specific.

What materials do I need to begin drawing realistic portraits?

You can start with very basic materials: a set of graphite pencils (HB, 2B, 4B, 6B are a good range), a good quality drawing paper (medium tooth), an eraser (kneaded and plastic), and a blending stump or tissue. Advanced artists might add charcoal, colored pencils, or different paper types.

How does drawing from photos compare to drawing from life for realism?

Drawing from photos can be a great starting point, offering a static reference. However, drawing from life provides a truer understanding of three-dimensional form, color, and shifting light, which is invaluable for developing a deeper sense of realism and observational skill. Ideally, incorporate both.

Who should focus on learning how to draw realistic portraits?

Anyone with a passion for capturing the human form and expressing individuality through art should learn. It's ideal for aspiring fine artists, illustrators, concept artists, or simply hobbyists who enjoy the challenge and reward of creating lifelike representations.

Are there health risks associated with drawing realistic portraits?

No, drawing realistic portraits is generally a very safe and even therapeutic activity. Ensure you have good lighting to prevent eye strain and maintain proper posture to avoid back or neck pain, especially during long drawing sessions.

What's the future trend for realistic portrait drawing?

While traditional methods remain timeless, the future sees increasing integration with digital tools. Artists are blending traditional observation with digital rendering, 3D modeling for anatomical study, and AI-assisted tools for reference generation, pushing the boundaries of realism and efficiency.

Armed with these insights and techniques, you are now ready to embark on your journey of how to draw realistic portraits. Remember that mastery comes with patience, persistence, and a genuine joy for the process. Pick up your pencil, observe the world around you, and start bringing faces to life on your canvas today!

Topics: how to draw realistic portraitsportrait drawing techniquesrealistic art skillsfigure drawingshading portraits
Leo List
Brampton weed
Adultwork